Microsoft® FRx® has a feature named FRx® WebPort. It’s is a separately licensed feature of that allows authorized users to output both Microsoft FRx reports and non-Microsoft FRx items to a Web repository.
Microsoft FRx reports are most commonly published to FRx WebPort from FRx® Report Designer. Microsoft FRx reports in the following output formats can be published from FRx Report Designer to the FRx WebPort repository:
- FRx® DrillDown ViewerTM (Enhanced XML)
- XML
- HTML (Via Excel 2000)
- ASCII
- Microsoft® Excel
- Lotus 1-2-3
- OLAP cubes
- Run FRx Installation Wizard from FRx CD
- Select “Install FRx Web Port”
- Choose Setup Language as “English”
- Accept User License Agreement
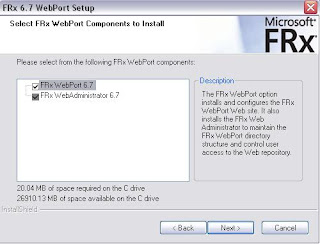
- Select FRx Web Port Components.
- Choose Destination Folder, this folder will be shared after the installation and will hold all the published report of FRx Web Port.
- Enter the UNC share name for the FRx Web Port Folder.
- Enter Virtual Director Name For FRx @ IIS Default Web site.
Step 2- Register FRx Web Port:
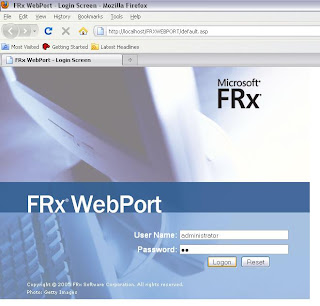
- Open Internet browser, and type the following address
http://
- click on administration link.
- Enter the registration info here and press update button.
Step 3- Publishing FRx reports to FRx Web Port:
- Open FRx Report Designer, select any report.
- Click On Output tab , then select web publishing tab.
- Mark “Publish to Web” check box.
- Select “Web Location”, it will be the location of FRx Web port folder and the repository file. Like C:\FRxWebPort\Data\repository.xml
-
- Enter “Report Name”, this name will appear to the user on FRx Web Port.
- Generate the report.
Step 4- View Published Report on FRx Web Port:
- Open Internet browser, and type the following address http://
- On the main page published reports will appear.
- Click on the report, it will open in a new window.
Step 5- Publishing Non FRx reports to FRx Web Port:
- Login to FRx Web Administrator
- Click on “New Report Link”
- Enter “Report Name” & select the Non FRx Report Location.
- Now Open Internet browser, and type the following address http://
- On the main page published reports will appear.
- Click on the report, it will open in a new window.


Thanks for the information.
ReplyDeleteI am glad you find information in the post helpful.
ReplyDeleteHello Waqas,
ReplyDeleteAm on FRx SP10. I have report server installed along with it. Now Report server is to be uninstalled. Is there any articles / documents / KB on this. I searched in Partnersource, which i couldnt find for report server. Can you suggest some way how to uninstall report server alone.
Thanks,
Arun.
Hi Arun,
ReplyDeleteThere is not any document on partner source for Report server installation, but you can uninstall report server in add/remove program under control panel administrative tools.
Before you proceed with un-installation i would recommend you to take backup of your report set.
Thanks,
Waqas